

Create an API key
- Open Settings, then select API Keys under Organization.
- Click New API Key.
- Enter an API Key name (up to 128 characters). Pick a name that says where the key is used, such as
prod-chat-serviceoreval-pipeline, so you can tell keys apart later. - Choose when the key expires. Set Expiration Date is on by default with a 30 days term; you can also pick 7, 60, or 90 days. The key expires at midnight, in your local time, at the end of the last day of the term, and the exact time is shown below the selector. Turn the toggle off for a key that never expires — it then stays valid until you revoke it.
- Click Create. The Save your API Key dialog opens with the full key.
- Click the copy button to copy the key. To see the key first, click the eye icon.
- Store the key somewhere safe, such as your secret manager.
- Click Done.
Use an API key
Send the key as a bearer token in theAuthorization header of every request to https://inference.cloud.vessl.ai/v1. Set it as the VESSL_API_KEY environment variable first:
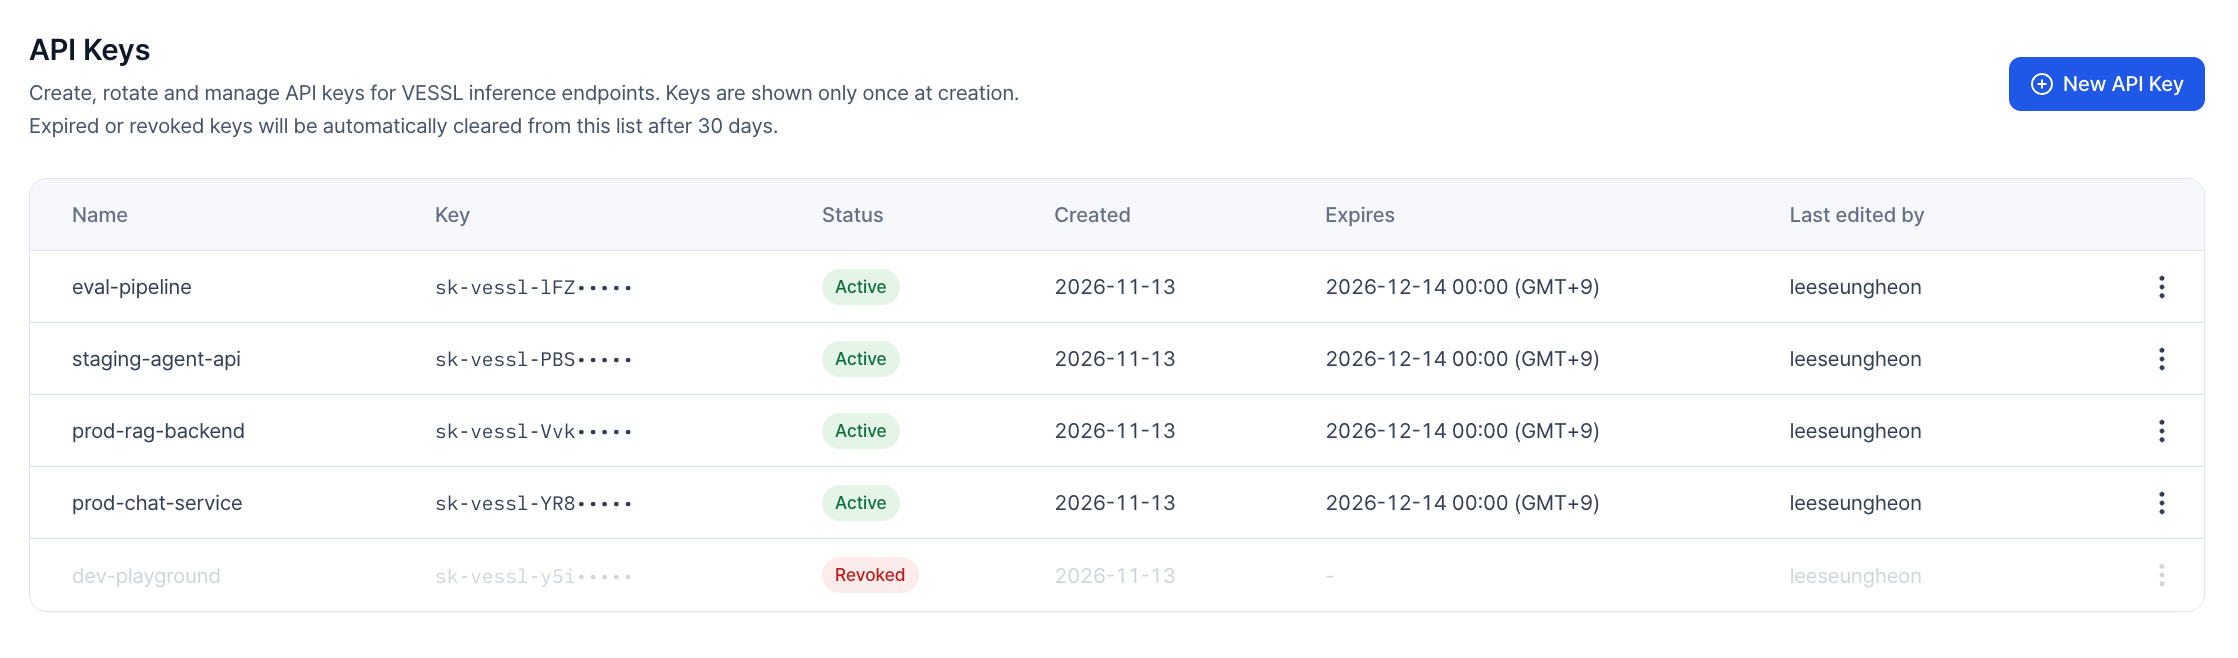
The API Keys list
Active keys appear first. Within each status, the newest keys come first.The list shows the following columns:
- Name: The name you gave the key
- Key: The leading characters of the key, followed by a mask. The full key is never shown here.
- Status: Active, Expired, or Revoked. See API key status.
- Created: The date the key was created
- Expires: The expiration date and time, or Never for a key without an expiration date. Revoked keys show
-. - Last edited by: The member who last created, renamed, or revoked the key
Permissions
Members don’t see the ⋮ menu in the list. If you’re a member and think a key has leaked, ask an Organization admin to revoke it. For the admin procedures, see Rename and revoke API keys.
Rename an API key
- Click the ⋮ menu at the end of the key’s row and choose Edit.
- Change the API Key name.
- Click Edit.
Revoke an API key
Revoke a key when it’s no longer needed or when you suspect it has leaked.- Click the ⋮ menu at the end of the key’s row and choose Revoke.
- Type the key’s name to confirm.
- Click Revoke.
Replace an API key without downtime
To switch to a new key without interrupting traffic, create the new key first and revoke the old one after your applications have moved over:- Create a new key. See Create an API key.
- Update every application that uses the old key to send the new one.
- Once no traffic uses the old key, revoke it. See Revoke an API key.
API key status
A request with an expired or revoked key fails with an authentication error. Create a new key and update your application to use it.